 invalid-file
Using Nautilus Scripts
I am taking this tip from here first you need to download two scripts for mount iso images download from here for unmount iso images download from here
Once you have these two scripts you need to change the permissions using the following commands
sudo chmod +x /home/username/mount.sh
sudo chmod +x /home/username/unmount.sh
Now you need to copy them nautilus scripts
sudo mv /home/username/mount.sh ~/.gnome2/nautilus-scripts/
sudo mv /home/username/unmount.sh ~/.gnome2/nautilus-scripts/
That’s it now you are ready for mounting and unmounting your ISO images.
Example
Mount ISO Image
Now i have one ISO image if you want to mount you need to right click and select scripts ---> mount-iso

Now it will prompt for root password and click ok

You can see the Mounter notification like the following

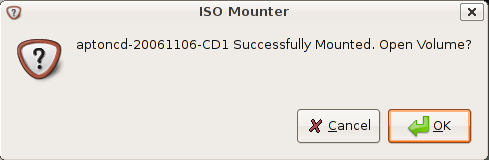
Here is the Successfully mounted message if you want to open this one click ok
This shows you available contents in mounted ISO image

Unmount ISO Image
Now i have one ISO image if you want to mount you need to right click and select scripts--->unmount-iso

Using Nautilus Scripts
노틸러스 스크립트 사용하기
I am taking this tip from here first you need to download two scripts for mount iso images download from here for unmount iso images download from here
Once you have these two scripts you need to change the permissions using the following commands
아래와 같이 하면 되고 username대신에 여러분에 우분투 로긴 ID를 써넣으면 됩니다.
sudo chmod +x /home/username/mount.sh
sudo chmod +x /home/username/unmount.sh
Now you need to copy them nautilus scripts
sudo mv /home/username/mount.sh ~/.gnome2/nautilus-scripts/
sudo mv /home/username/unmount.sh ~/.gnome2/nautilus-scripts/
이렇게 되면 끝이나구요.
That’s it now you are ready for mounting and unmounting your ISO images.
Example
여기서부터는 실제로 사용 예입니다.
Mount ISO Image
Now i have one ISO image if you want to mount you need to right click and select scripts ---> mount-iso
Now it will prompt for root password and click ok
You can see the Mounter notification like the following
Here is the Successfully mounted message if you want to open this one click ok
This shows you available contents in mounted ISO image
Unmount ISO Image
Now i have one ISO image if you want to mount you need to right click and select scripts--->unmount-iso
Here is the Successfully Unmounted message

Using loop Kernel Module
loop 커널모듈사용해서 직접마운트하기기
스크립트 사용하기가 모하신 분들은
First you need to make the directory to put the ISO into using the following command
아래와 같이 칩니다.
sudo mkdir /media/isoimage
Now you need to add the loop module to your kernel.
What kernel loop module does?
I want to give brief introduction to kernel loop module.Using the module loop it is possible to mount a filesystem file. squashfs is a “loop” with (de)compression (Compressed Loopback Device) and it is possible to mount a compressed filesystem like a block device and seamlessly decompress its data while accessing it.
Use the following command to load loop module
그리고 loop 모듈을 올리시구요 아래처럼.
sudo modprobe loop
Mount ISO Image
If you want to mount you need to use the following command
아래처럼 타이핑하면 마운트 됩니다.
sudo mount debianetch.iso /media/isoimage/ -t iso9660 -o loop
In the above command you can replace debianetch.iso to your own iso image.
Now you should have your iso file mounted, and accessible from your desktop.
Unmount ISO Image
Unmount ISO Image Using the following command
마운트해재시에는 아래처럼하면 됩니다.
sudo umount /media/isoimage
Here is the Successfully Unmounted message